currents by jen geigley

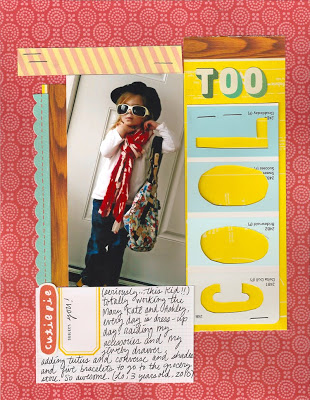
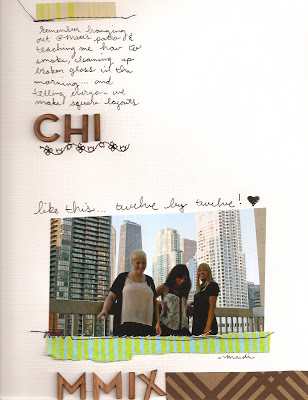
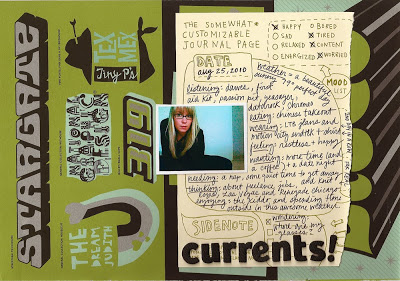
Pretty stoked about the 'right now.' Embracing this whole back-to-school mentality. (Even though the thought of dropping Lo off at preschool makes me want to cry.) Getting excited for Chicago Renegade adventures and Vegas weddings and lots of time spent with my pal Erin next month. New Dare is up, and we're paying homage to Tina's currents. (This week, there's something pretty awesome in it for you if you play along. And check out the full house ... Kristi, Jamaica, Vee, Tina and Nisa!!)

a-okay! by jen geigley

Bo and I have a thing for Mid Century Modern stuff. And furniture. And Craigslist. (Sometimes it's good to live in the Midwest.) And one of our most favorite shops in Des Moines is A-Okay Antiques.
We stopped by last weekend to see what was new. This place is just a treat to visit ... there are almost too many wonderful things to see.
Eames + Noguchi.
And so much more ...
Love the Eames pressed plywood shelving unit above. (I can't even begin to list the things in some of these photos that we have had our eye on.)
But my favorite piece of furniture in the whole place is this blue and green George Nelson sofa with the little white table. It's in great shape and the colors are divine ... this would look so incredibly cool in our living room.
This elephant gray leather Eames chair ended up being our score of the day. (Sixty bones!) Like I said, sometimes it is good to live in the Midwest. (Now who is coming to visit?)

The Corporation rides again. by jen geigley

Just a few pics from The Corporation's ride in the Iowa State Fair kickoff parade through downtown Des Moines. (Looks like fun, huh?!)I had a rad time riding in the sidecar (although we were bummed that we couldn't throw candy!) But we had a great time hanging with our scooter friends (beeping our horns back and forth to make people laugh.) Fun. :)

Real Great. :) by jen geigley


Yo Gabba Gabba is literally popping up everywhere cool these days. Have you seen this footage from MGMTs show featuring the Yo Gabba Gabba characters during their song 'Kids?' (Watch for them at around 3:05!!) Man, it would have been amazing to be there!

And then check out these dancing DJ Lance Rock girls at a Flaming Lips show in Toronto. (all photos from Yo Blogga Blogga and GabbaFriends.com)

Here's the gang with Stephanie Pratt (from the Hills) at Habitat for Humanity.
Also, I had to share some of the latest merch that's available this fall. I'm always stoked to see what's new. If you were out looking for the elusive Yo Gabba Gabba backpack (like we were) this season, you might be able to score this one at Barnes and Noble. It's a toddler-sized one (a bit smaller than normal) which was perfect for us.
And check out this rad (almost 80s style) Activity Tray! I totally had a tray like this when I was a kid ... pretty sure mine had Cabbage Patch Kids on it. (This one is much cooler!)

These pillowcases from Ty's Toy Box would look amazing in any kid's room.

The YGG pumpkin carving kit will be mandatory at our house this Halloween. (You can find it on Amazon.)
And if your kid can throw down some cool tricks, you have to enter this contest! Gabba fans are invited to upload a 30-60 second video demonstrating their Cool Trick to win the opportunity to receive a VIP family 4 pack of tickets to the Yo Gabba Gabba Live: There's A Party in my City! show closest to their hometown. (Find all of the info here.)

And if you've made it this far ... YAY! Because I'm gonna let you in on a little secret. Keep watching this blog during the next couple of months for a majorly HUGE giveaway that you're seriously not going to believe. (That's all I can say for now!)

Road to Renegade (part 2!) by jen geigley

(photo via Market Day)

When I first started vending at craft fairs, the most perplexing thing to me was putting together my display area and tables. I don't know why this seemed so difficult, and I'm sure it comes naturally to some people, but I think that sometimes it was challenging for me to envision my space (and what would fit into it) and then figure out how to utilize that space to show all of my handmade wares in the best way possible. I scoured the internet to look for other vendors and see how they tackled their booth design, but didn't have a whole lot of luck finding answers to my questions.

In my experience, shows offer anywhere from a 6x6' to a 8x10' or 10x10' space for you to do what you want with. I'm pretty sure that for the first shows I ever went to, I just used two side-by-side card tables with a plastic tablecloth from the party store thrown over the top. That was about as far as things went – it probably looked like the college dorm room of craft tables. At the time, I hadn't seen other people's displays yet and it hadn't occurred to me that I could get a little bit more inventive or use things to build some interest.

Over time, my display items have changed and evolved a lot. I eventually accumulated this bin of things I'd keep for shows and I'd just take what I needed each time. (It wasn't always pretty.) So when I decided to apply for Renegade, I thought I'd give my display a little bit more thought. I needed an upgrade, but on the cheap. And I wanted things to look a little more consistent instead of the weird mix of whatever-I-had-lying-around plan of attack.

So here are a few things I've put together. It's simple, I used inexpensive materials, and it gives my booth a more cohesive look. For Renegade, I'll have a 10x10' space, and I'll be borrowing my sweet friend Erin's 10x10' pop-up tent. I'll be using three 6' folding tables, and I purchased some light gray canvas at JoAnn's Fabric to use as tablecloths. (*Note: You might be tempted to go crazy with your tablecloths and use bold/dark colors or busy prints, but just double check to make sure that that your tablecloth won't compete with the handmade items you're going to display. A lot of people tend to go straight for black tablecloths, but if your merchandise isn't light-colored, your stuff is going to get lost.)

I finally went ahead and purchased a vinyl banner for my booth. (I put together my own graphics and ordered from Wilson Graphics ... they seem to be the go-to shop on Etsy for custom banners.)

I purchased some stackable wire rack bins that were originally white, and also a white drying rack (which I'll use to hang some of my scarves.) I spray painted both the wire bins and the drying rack a light blue color.

And this is where Krylon became my best friend forever. I knew right off the bat that I didn't want to leave all of these items plain white, and spray paint became the perfect inexpensive tool that I could use to tie all of my booth elements together. I grabbed four cans of Krylon in yellow, light blue, orange and gray. I rounded up some clothesline and clothespins that I'll use to hang up some of my items (and also my banner.) And then I spotted this adorable tutorial on Made, one of my favorite sewing blogs. Spray painted clothespins!! Perfect. (I totally didn't even mean to use the same colors as she did, but those were the colors I already had! Funny.)

I attacked several other things with the spray paint. (Because it's dangerously fun.) I used the light blue again to paint the wooden base and top of my dress form.

And I couldn't stop there, so I spray painted some sticks from our yard and put them in vases in our living room.

And then I painted a chicken. I know, I know ... Jen, put down the Krylon. (My mother-in-law has an awesome sense of humor, and sometimes when she goes to garage sales, she'll pick up a ceramic poodle or panther or ... chicken ... and put it in our yard as a joke. So I decided to paint this guy for fun. He's not part of my display. I just wanted to take a photo of him.)

Anyway. A smart thing to do before a show is to do a mock set-up in your garage, basement or back yard. This is a great way to finally see what everything will look like together and to add/edit things to get your booth looking the way you want it to. Mask off the dimensions with duct tape on the floor or just set up tables and measure to make sure you're within your space limits. Figure out where your aisles will be and leave enough room for people wander in and look around. Don't forget to leave a space for you and your helpers to sit (and leave an exit space so you can get in and out of the booth without knocking things over.) Think about where you'll hang your signage – on the outside of your tent or hanging from the front of one of your tables (or both.)

More ideas for craft booth displays:

- paint a cool vintage frame and stretch it over some fabric to show off and hang small items (like jewelry)

- use small shelves, boxes, or other display items to give your tables a richer feel

- use different sized small fold-up tables or t.v. trays to add different levels of height to your area

- use table risers to lift your display up closer to eye level (these from IKEA are perfect and inexpensive)

- separate and organize small items in wire baskets, plastic lunch trays, thrifted wooden soda crates or colorful old suitcases

- use your own handwriting or type something up in a cool font and make up a sign that lists all of your pricing; display it in an old frame

- utilize quilt racks, small bookshelves and anything that can fold up or can be quickly assembled/disassembled

- make your own banner or sign out of fabric, stencils, your own handwriting, fabric paint, machine stitching, felt, embroidery, etc. (i think handmade signage adds character!)

- paint some pegboard, prop it up in your display area and use it to hang your items so people can see them from afar

- utilize chalkboards, easels, cork boards and whatever else you may have lying around at home to help enhance your space

- bring your own lamp to add a bit of lighting (if the show is indoors in a potentially dark building and you have access to outlets/extension cords)

- scout out props that relate to your craft at garage sales and thrift stores; collect things that can serve as storage/shelving

And last but not least, here are a few more awesome craft show booths to check out. Twinkie Chan has one of the coolest and most original displays I've ever seen – she incorporates a real retro fridge into her space! And check out this rad custom-built self contained print cart by Tugboat Printshop. Brilliant. And I enjoyed looking through this re-cap of some of the stand-out displays from Renegade in Brooklyn.

Hope this was helpful ... please feel free to ask any questions if I missed anything. And thanks so much for your feedback. (This has been fun!)

the Road to Renegade (part 1) by jen geigley

Right now, I'm knitting (and knitting) and getting ready to pack up and drive to Renegade next month. And as I work, I've been reflecting on how this whole craft show thing breaks down and what I've learned from my tiny bit of experience. I realize that this post may not interest everyone, so here's your disclaimer: What you are about to read is about craft shows. And more specifically, this post is aimed toward people who are interested in selling their hand-made things at craft shows.

I love talking with people who are enthusiastic about handmade goods, handmade artists and local craft fairs. And I love it when people email, wanting to know more. I've received quite a few emails from craft show virgins with questions like these:

1. How can I get into craft fairs?

2. What do I need to know (and do) to get started?

I don't know the hard and fast answers to everything, but the following hopefully explains a few things I've picked up along the way.

My friend Erin and I started selling our handmade goods at craft shows a little over three years ago. In that short time, we've actually learned a lot. We've weathered (sometimes literally weathered) all kinds of circumstances. We've survived slow shows and basked in the glory of successful shows. The good and the bad; the blood, sweat and tears. Okay, maybe not tears, but I think we'd both agree that there has been a lot of sweat involved. Mostly during the loading in and setting-up part.

The application.
This is the question I get the most; 'How do you get in?' Do a little research and find out as much as you can about the craft shows offered in your area. Choose shows that best fit with what you make, and then apply. Most craft fairs have a website with an online application or a list of info that you'll need to copy into an email and send back. Many shows are juried, meaning that you may have to submit an explanation of who you are and what you do along with a few photos of the items you plan to sell. Once you're accepted, be ready to pay your booth fee. (Craft show organizers appreciate timely payments, so don't wait until the vendor fee deadline passes or you may risk losing your spot.)

The actual making.
The fun part, right? Yes! Pace yourself if your craft is time-consuming. Make goals and don't put things off until the last week – or last night – before the show. (I've definitely done this a few too many times and learned this lesson the hard way.) You will most likely spend the last few days before the show pricing things, making signage, working on your display, packing things up, and finishing up last minute details. And that stuff takes time, so don't wait until the last minute to make all of your stuff. You'll be glad you worked ahead. There's no magic number or formula to determine how many items you should have on hand – I always tend to freak out a tiny bit before each show, wishing I had made just a few more things. But it's best to just do what you can, when you can, and carry on.

Don't be afraid to share.
Are you intimidated by jumping into your first show ... gulp ... alone? (I totally understand.) If you're lucky, maybe you have a crafty friend who would be willing to share a booth with you. Most craft fairs that I've vended at will allow you to split a booth space with another vendor, even if you each make different items. (Note: A shared booth may cost a bit more than the normal booth fee. And please be sure to ask the organizer if it's okay before you decide to split a booth with someone.) My friend Erin and I shared a booth for countless shows when we were getting started. We were booth-mates until we got to the point where we actually outgrew that space and needed our own tables. It was awesome to spend the day together, help each other out, and feel like we weren't completely on our own. But the number one benefit of vending with a booth-mate (or at least bringing a helper friend who is willing to help you out for the day) is having someone who can grab you a soda or a sandwich, or give you a bathroom break. (Trust me ... you won't want to leave your booth unattended. And you're gonna have to pee at some point.)

Bookkeeping.
First order of business: you're going to need to get a state tax ID/state sales tax license. I promise that this isn't nearly as scary as it sounds. Your craft show organizers can usually get you in touch with the right information for the state you live/sell in (or you can Google it.) For everything else (expenses, receipts, worksheets, goal-making, budgeting, etc.) I highly recommend the Craft Inc. Business Planner. It has everything you will need to make the bookkeeping part of your crafty business a lot easier (and it's really well-designed, too.)

Diversify.
It never hurts to offer items at different price points. If you sell lots of things that are higher priced, consider making some smaller less expensive items to sell as well. Keep in mind that craft show shoppers may not be carrying $95 in cash. Offering a variety of items at a range of different prices may help you be more successful. Also, if you are willing and able to accommodate custom orders, draw up some order forms and have plenty of copies on hand.

Organization.
Be prepared. Have business cards and pricing ready before the craft show's doors open. I read somewhere that it really is best to have all of your items marked with pricing so no one has to ask how much something is. Have plenty of cash on hand to make change – ones, fives, tens and a few twenties. Have a clipboard and a few sheets of paper handy so that people can sign up for your mailing (or emailing) list. Booth set-up can take longer than you'd think so give yourself a little extra time and you'll be glad you're ready once the first few early birds come trickling in. Be prepared in case there's a rush right off the bat – sometimes there's a line of people waiting to get in!

Branding.
If you're going to go for it, go for it! Work on a cohesive design for your Etsy banner, business cards, signage, and promo materials. Then be consistent and stick with it. If you have established a look, you'll be easier for people to remember. It's totally okay for you to work on this part gradually, and you can even make your own table signage/banner yourself out of paint, stencils, fabric or whatever materials you think would work best for your booth's style. (I love using mini cards from Moo.com – they price is right and the quality is great. They work wonderfully for both price tags and business cards, and they have my logo/banner/contact info on the reverse side.)

Traffic.
The amount of people who visit the craft fair that you're vending at directly depends on how much they've heard about it. Lots of craft shows are grass-roots efforts – help out if you can! Contact the organizers to see if you can help spread the word, whether it's by distributing posters throughout your neighborhood, blogging, or utilizing social media (Twitter and Facebook) to spread the word. Advertising is key to your success rate.

Loading.
Loading in and loading out (your wares, your tables, your display items) can suck. But it doesn't have to. Plan ahead. Scout out the venue you'll be vending at ahead of time if you're not familiar with the location. You might be loading things in from a parking lot a few feet away from the front door, or you might have to deal with stairs, elevators or navigating your way through city streets. If you can, bring displays that fold up, are lightweight or collapsible. Bring a friend or two to help you set up and tear down. Use a wagon that you can load up with your heavy goods if you are setting up in a building without stairs (this is what my friend Lara does.) Give this part some extra thought if you're dealing with lots of large, heavy objects.

Attitude.
Guess what? You aren't just a crafter; you're your own salesperson. Keep a positive, friendly attitude. Don't sit around and look smug, too busy, or too bored – stand up and say hello. Make conversation, be engaging, but never pushy. Be yourself and show customers who the cool person is behind all of your cool handmade stuff.

Be friendly to your neighbors.
Your crafty neighbor at the table to your left is not your competition. Make friends with other vendors; you might learn something from them. Say hi, introduce yourself and exchange business cards. Observe what successful vendors are doing and take note. The very first time Erin and I shared a table at a craft show, we were booth-neighbors with Jade Scott, a talented jewelry maker. She was the perfect example of the approachable, memorable, easy-to-talk-to vendor. She made easy conversation with nearly every person who stopped to take a look at her jewelry. She gave quick explanations of her products and pricing and made people feel free to ask their own questions. You could tell that people remembered her and she seemed to have a lot of repeat customers. And guess what? She made a ton of sales.

No whining. If you're having an off-day, chalk it up to experience. Sometimes the success of a show requires a bit of luck. And every show is different. It all comes down to the right buyers finding just the right 'thing' that they can't live without. If in doubt, re-evaluate your product or your price-points. You might benefit from changing things up a bit next time. And if not, then so be it. But don't give up. Your next show may be a totally different experience.

List of things to bring.
- tent (if needed, for outdoor shows)
- tables (if not provided by venue)
- folding chairs or lawn chairs (if not provided by venue)
- tape
- scissors
- Sharpie
- a cooler with snacks/beverages
- signage
- price tags
- extra cardstock/paper
- custom order forms
- business cards
- mirror (if needed for customers trying things on)
- rope, twine
- clothespins
- table cloth(s)
- calculator
- paper shopping bags (optional, for customers who may want a bag for their item)
- notebook
- pen
- metal box or zippered bag to hold cash
- receipt book
- trash bag
- promo items (postcards, buttons, freebies)

* Check back for my Road to Renegade (part 2) post on Wednesday, where you can see how I've been putting together – and revamping – my booth/display. *

our most excellent adventures in ohio by jen geigley

A week ago, I was hanging with at this girl's place with six of my long-distance friends. We had such a fun weekend (and Mandi did an excellent job playing hostess!)
I can't tell you how nice it was to catch up with everyone. It just felt good. While we were there, Vanessa found out that she gets to move forth with plans to open her coffee shop in York, PA.
And Mandi got the news that she'll be freelancing as an Apartment Therapy blogger.
I was super lucky to get more face time with super sweet Vee (for the second time this year!) So many good laughs with this girl.
Danielle shared a mattress with me, and was killing it with Real Housewife impressions and her usual fantastic sense of humor. (Miss her so!)
Sweet Steph brought her southern hospitality and made us all breakfast.
Patty, in keeping with tradition, hid in some bushes and kept us laughing all weekend.
(I even got a little knitting done.)We lounged and made ourselves at home in Mandi's lovely new apartment.
We ate at charming Canton/Akron lunch spots, coffee shops and ice cream parlors.
And of course, when you're staying with miss Fine & Dandy herself, you can count on some fabulous thrift store shopping.
Danielle might have single-handedly cleaned out the state of Ohio of milk glass, Vee scored some vintage thread spools and globes, and I think we all found a few treasures. (Some had to ship theirs back home!)Memories were made, we drank quite a bit of sangria, Polaroids were taken, and we even scrapbooked a whole evening away. If only we all lived a little bit closer ...

scraps by jen geigley

Sheesh, I have so much to share but can't seem to keep up this week! It's 1:30 a.m., I just finished designing a logo for a freelance client, I desperately need to knit, but I think that's gonna have to wait until tomorrow.
I am super anxious to post lots of pics from my weekend in Ohio with six most excellent friends, and I promise ... that's coming soon.
But for now, we've got some new Dareness. Dare 166 is up – papercuts. My papercuts (which hardly qualify) were made in Ohio with a borrowed craft knife, and this page was a quickie. (Hurry up and go check out the other girls' Dares ... Jamaica, Kristi and Tina did some pretty spectacular things for this one.)
Here's another quick page I made while crafting with my friends. Kind of rad to be sitting right next to Vee while I documented a few of my fave memories from our trip to L.A.
And I brought a TON of photos with me to Ohio, so I was freely giving them out to anyone who needed something to do. Mandi made this page with a pic from our adventures last year in Chicago.
And Vee made this page with a couple of photos that Tina took from CHA in January. Super cool to do a little photo swap and put my friends' pages into my scrapbooks at home. (And seriously, those weekend pics are coming soon ... I swear!)